A unique and cheap way to start TIG welding pipe. The world is full of round stuff, whether you're a hobbyist, a welding student, or a pro, I'll show you how to gain lots of pipe welding experience fast.
Where do Professional TIG Welders Start on Pipe?
Socket welds and slip-on flanges! If you're a professional TIG welder starting out on pipe, your first jobs will likely be on these.

Are Slip-On Flanges and Sockets the Same?
No. But the weld method and skill is similar. For both, the pipe is inserted into a fitting and the seam(s) welded.
So let's make some socket and slip-on flange simulation coupons!
What Materials & Tools are Needed?
All you need is two pieces of pipe that fit snugly inside one another. It's best if these pipes are between 1-2" in diameter.

An angle grinder, die grinder, and spud wrench is helpful. And of course a TIG torch.

You can either use a fab table with a vise, or a tri-stand with a chain vise (as shown above) as your welding platform.
Cutting & Metal Prep
Cut the large and small diameter pipes into small sections, using either a chop saw or skinny wheel on an angle grinder. These only have to be 3-4" long each.
With two three foot pieces of scrap pipe, this will make a dozen weld coupons. And that's assuming you only weld one side of each.
Small Pipe Prep

Use a flapper on a die grinder to clean the mill scale, paint, and gunk off a good inch of the outside of the small pipe. Burr out the inside and clean up the end (as shown above).
Larger Pipe Prep

Take care to clean the face really well (above, left), because this is where the weld sits. Often overlooked, make sure the inside is clean (above, right); otherwise, while welding the root, contaminants can be pulled up through the seam.
Tacking it up
It's best to tack the coupon on its side. This keeps things easy to manage by yourself without a fitter.
Tack Opposing Sides
Start on the top (bottom, left) and then the bottom tack (bottom, right), before doing the left and right.

You can keep the pipe fixed while tacking, as shown, or roll it between each tack so you're always in the most comfortable position.
How Big Should Tacks be?
For small diameter pipe, keep the tacks small. Baby tacks. This keeps distortion down and gives more control over squaring and lining up your pieces.
The larger the pipes or fittings, the larger the tacks.
How Many Tacks?
Four. For this setup and most socket and slip-on flange welds, four tacks is the go-to.
Welding the Root
One nice thing about starting on pipe here? The first pass isn't an open root.

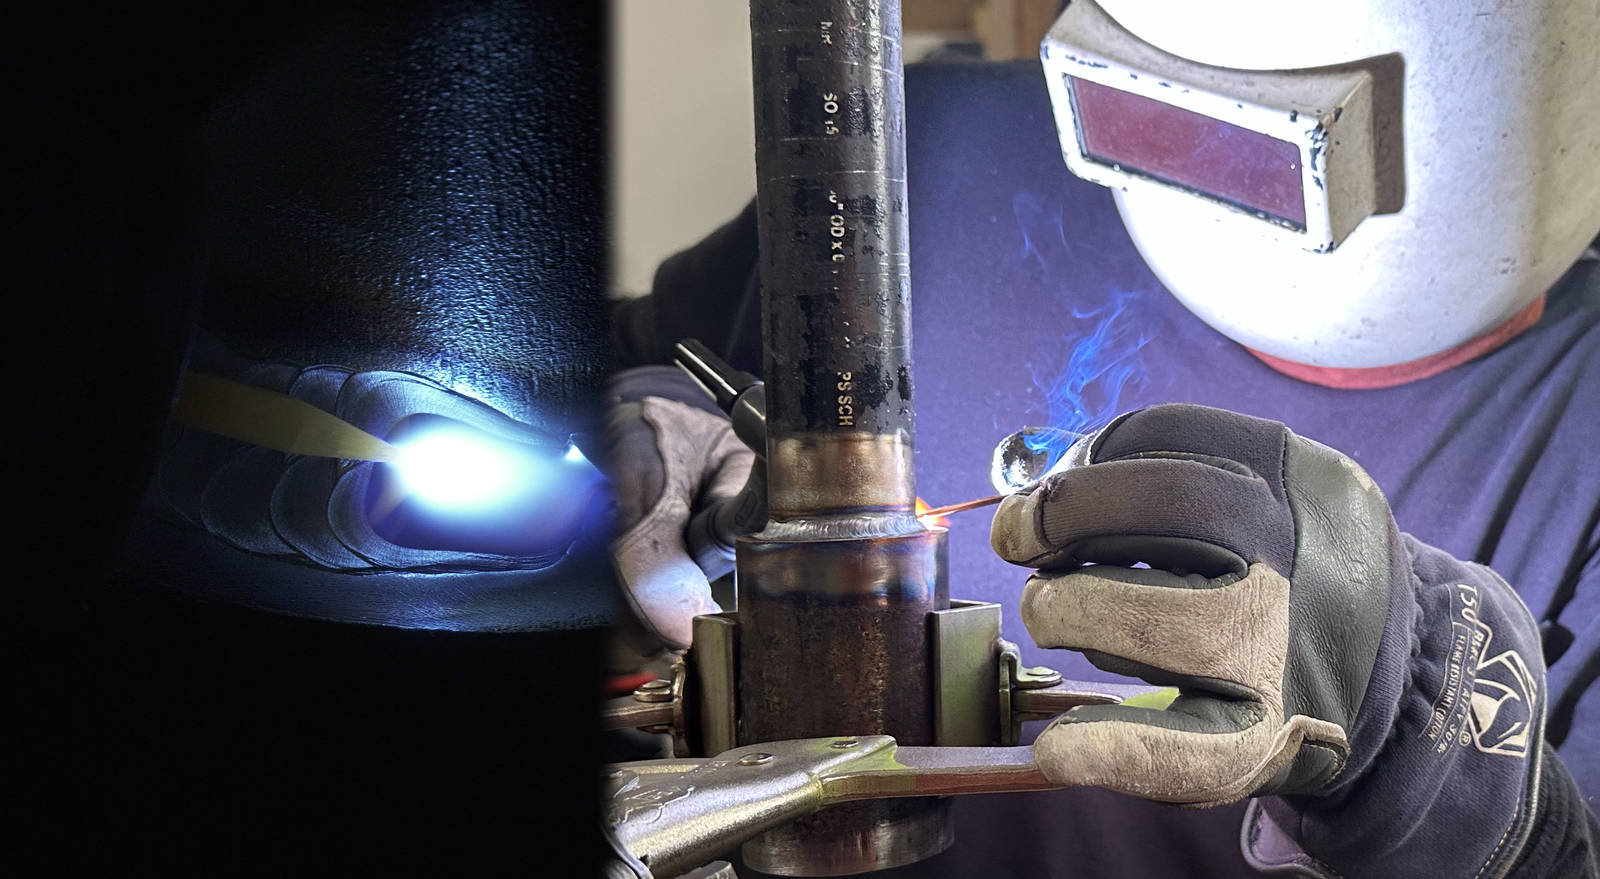
Orient yourself so you're looking down on the pipe. This lets you rest your torch hand easily along the pipe (above, left) while welding the root.
The weld puddle should flow into the seam of the joint (above, right).
Quarter the Pipe on the Root
Weld each section of root tack to tack. Keep things balanced by bouncing between opposing sides.
Welding the Fill Passes
Normally there would be a call-out for how much weld goes in a joint like this. But, since this is practice, we're going to fill it up. More practice!

(Above, left) shows how to position your body. (Above, right) shows the weld puddle during a fill pass. Note how the weld is barely overlapping the pass underneath it.
What if you Don't Overlap Passes Right?
If you overlap the toes of the prior pass too far, then the weld becomes concave. If you don't overlap the old weld, then you end up creating valleys.
Overlap each new pass barely over the sides of the prior pass and fuse it to the base metal on both pieces.
Make Sure to do This
As the fill passes start to get wider (below, left), make sure to keep the filler rod at the top of the weld (below, right), if welding in the horizontal (2F) position. Otherwise the weld will sag with gravity.

Is There a Faster Way to Fill it?
Yea. But when learning, it's best for each fill pass to be one filler rod amount at a time. 3/32 rod on smaller fill passes and 1/8 rod on larger.
First focus on quality, then work on speed.
Welding the Cap
The cap of any pipe weld is your signature. It says a lot about who you are not only as a welder, but as a person.

Always aim to do your best. Each new pipe is a new chance. Don't let the last one mess with your head. Go after the next with all you got.
Take pride. It's hard, but you'll get it.
How to Weld the Cap
It's the same motion and pattern as the fill passes. Keep the following in mind and you'll be good:
- Hold the filler rod at the top (if in horizontal position)
- Pause at the top (if in horizontal position)
- Flick more quickly to the bottom
- Watch the puddle barely overlap the corner edge
- Then back to pause on the top
What's the Horizontal Position?
The position refers to the orientation of the WELD, not the pipe. In this guide, the pipe is oriented vertical but the weld is horizontal (2F).
Secret to Shiny Finished Welds
A little trick, for making it to the end of the article.
Are your welds always coming out dull or matte? The trick to a super shiny finish is the following:
- Use a fine wire wheel brush on a die grinder
- Clean up the weld at the right temperature. Too hot and it dulls the shine. Too cold and the oxide won't come off easily and you'll end up with a dull finish
- Use a light hand on the brush over the weld
